B2B Lead Generation Services
Helping technology marketers reach the right buyers, generate demand, and drive pipeline.
Explore All →


Who We Serve
Helping technology marketers connect with the right buyers in competitive markets.
Explore All →


Recently VMware rebranded their end user computing (EUC) products all under the Horizon umbrella. This includes Horizon Workspace, Horizon Data, Horizon Mobile, and of course Horizon View.
Although Horizon View 5.2 was not a major release there are some significant changes and features that make it an even more attractive virtual desktop infrastructure (VDI) product. Namely the fact that you can now use any HTML enabled browser to connect to a virtual desktop and it no longer requires the end user to download a client.
In this article I’ll go through a high level install of Horizon View 5.2 along with the necessary installations to make HTML access possible from any mobile device. For complete installation instructions please go here.
We’ll first download the View Composer on vCenter (or another Windows server) and click on 'Go to Downloads' for VMware Horizon View 5.2.0 Premier Edition. All of the downloads necessary for installing Horizon View will be available there. The Premier Edition is necessary if you’d like to have linked clones. For more information on linked clones see this article.
We’ll also need to create a composer database using SQL Server Management Studio (or whichever database management utility you’re using). Once that’s created we can install Composer. You may run into some trouble if you have UAC controls turned on.
After composer is installed you can download and install the View Connection Server. In this case I’m only installing one, but the design will depend on your environment and whether you’d like to let people login from outside your network. In that case you may have four or more Connection and Security Servers. I’m also going to skip installing the certificate in this example. However, using a certificate from a certified authority is highly recommended.
As you’re going through the wizard you can stick with most of the defaults. You’ll want to install View Standard Server and pick the proper users to have admin access. You’ll then want to connect to the web console either by clicking on the new icon on the desktop or opening a browser and going to https:///admin.
In the Web UI you’ll first need to add a license under the Product Licensing and Usage tab. Then click on the Servers tab and under vCenter Servers click Add. You’ll add your vCenter server here. Again, for a basic install you can accept most of the defaults. You’ll need to specify your domain name and a valid user and password. Once that is done we can begin creating pools.
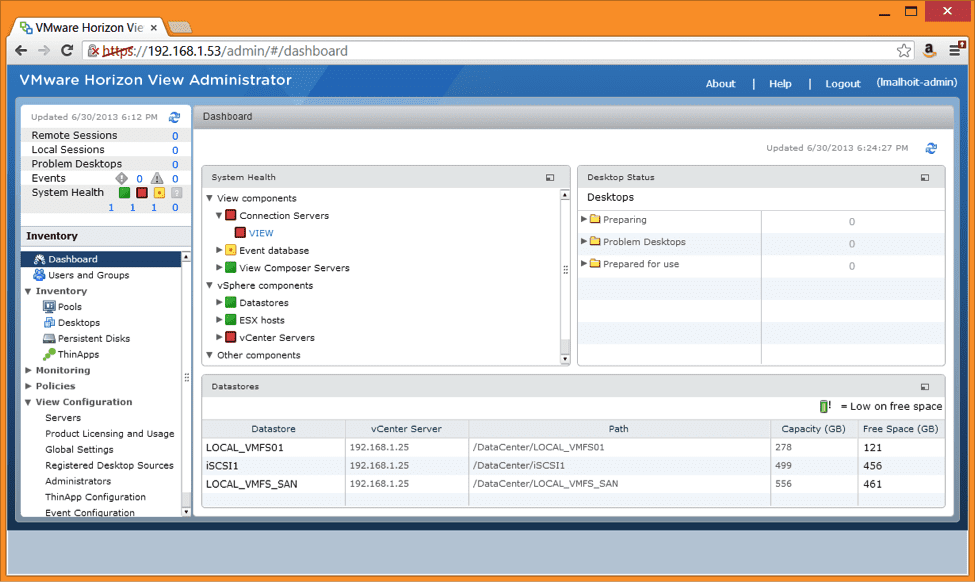
In the picture below you can see my View dashboard. You’ll notice that the Connection Server is red because I used a self-signed certificate:
You’ll need to have a virtual desktop created with something like Windows 7 or Windows 8 (which is supported in View 5.2). This will be your “parent vm.” You’ll need to install VMware Tools on it first. Then download and install the View 5.2 agent. After that you’ll download the View Feature Pack. This is new with version 5.2 and is what allows you to connect to a View desktop using HTML5 and gives you the proper tools to use View from a tablet or smart phone.
After you install VMware Tools and the View Agent do the following to install the Feature Pack on the Connection server and on the Parent VMs:
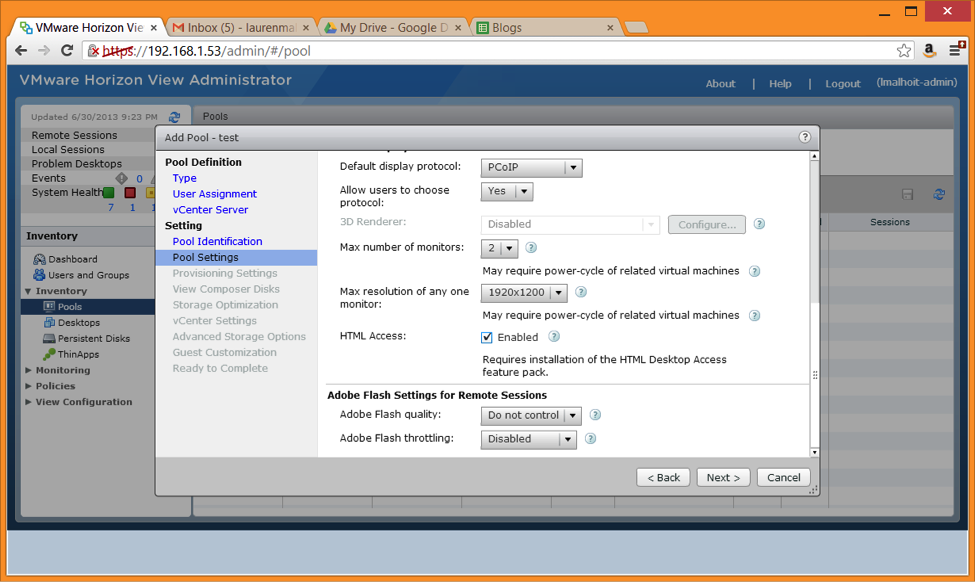
After all this we can go ahead and create a desktop pool. Follow through the wizard as you have in previous versions. The one difference here is that you need to allow HTML access during the creation of the pool. Under Pool Settings during adding a pool place a checkmark next to HTML Access as shown in the picture below:
Complete the wizard and allow for the provisioning of new desktops. When that’s complete you can connect to the virtual desktop using the traditional View Client or by opening a web browser and going to https://.
It will show you the pools that you have access to and give you a virtual desktop via your browser. See the picture below: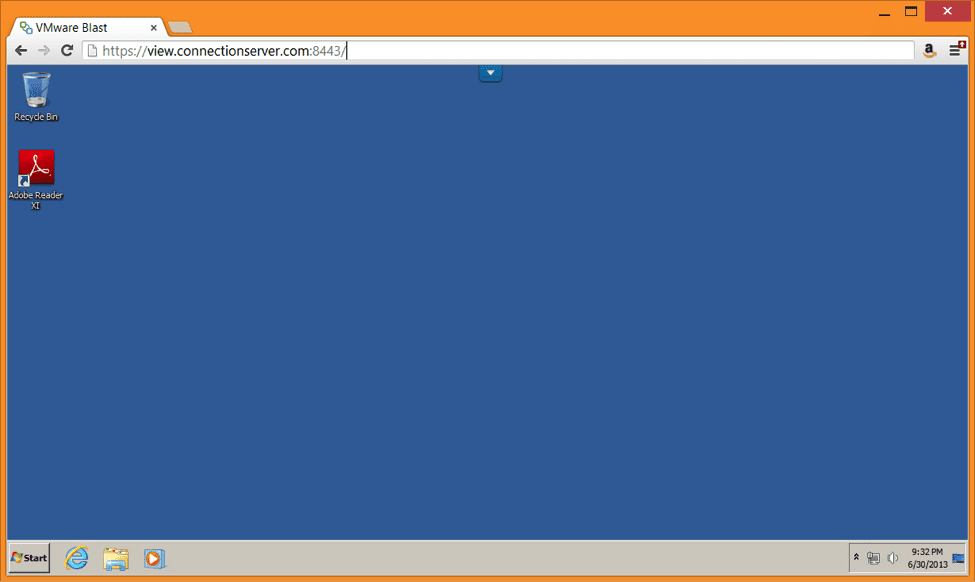
HTML access is a very exciting feature that opens a lot of BYOD possibilities for end users. Not to mention it provides a way for end users to connect without having to be a local administrator on their machine, which is a big win for the IT department.