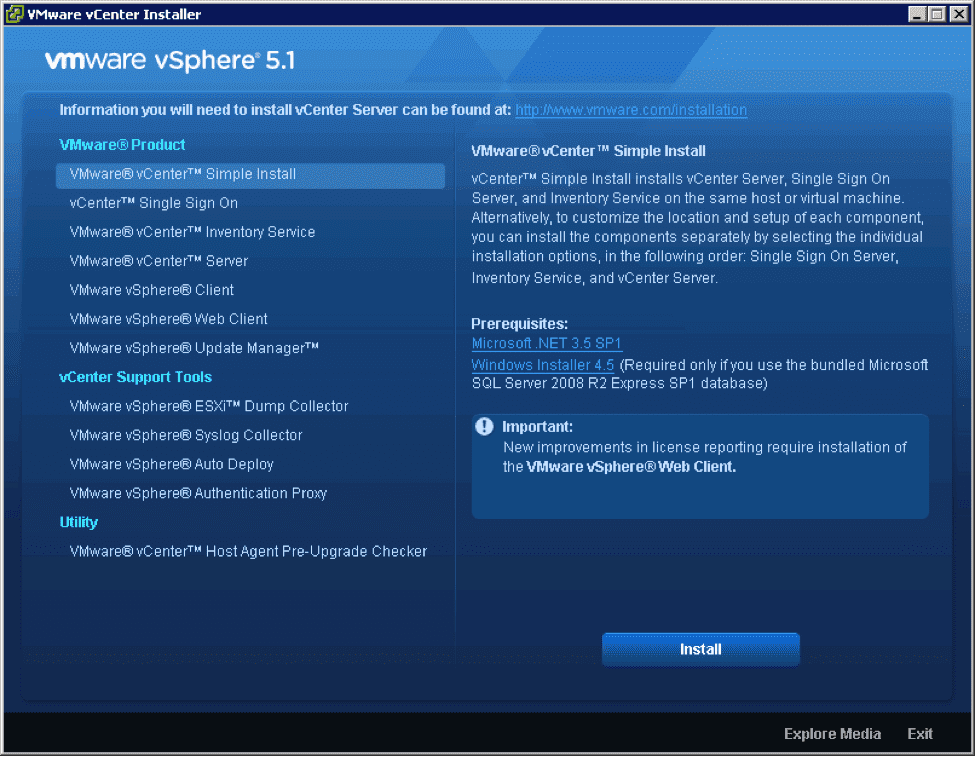
There are a couple ways to install the new vCenter 5.1 update 1. You can do a simple install which installs the Single Sign On Service, Inventory Service, and vCenter itself in the simplest way. You would use this if you only had one site and you’re not concerned with customizing too many things with the SSO service or vCenter.
In this article I’ll go through the simple install, where you basically install these services at one time. See the picture below to see the options available. I’ll break it into sections (SSO, Inventory Services, and vCenter), but again, it is pretty much one continuous install. After the installation is complete, I’ll go through setting up Single Sign On so you can sign on using Active Directory accounts.
You’ll need to attach the ISO installation file for vCenter 5.1 to your VM or download and extract it on the server itself.

SSO Install
- You can see that the VMware vCenter Simple Install is the first on the list. Go ahead and click on it and then click Install.
- The first window that pops up explains that you’ll be installing the SSO service first. Click Next through the intro screens and the EULA.
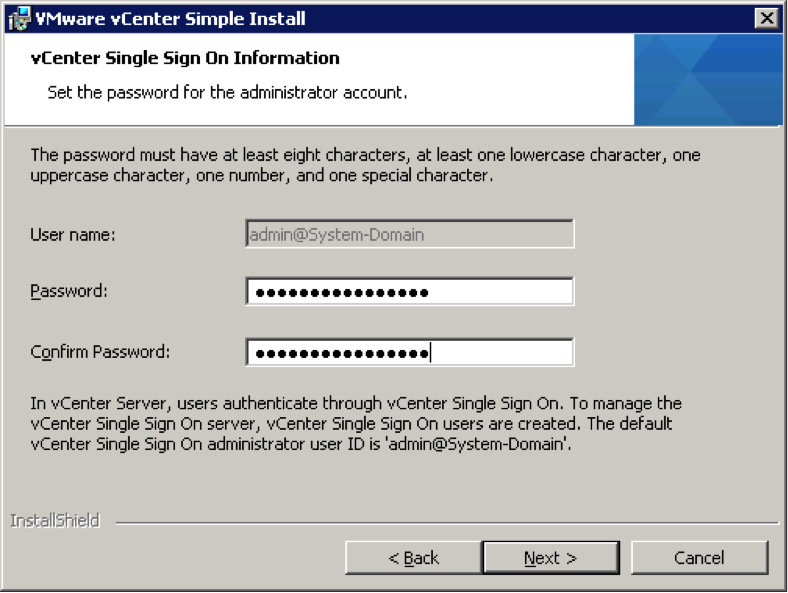
- The next screen that comes up is where you need to enter the password for the Admin@System-Domain user. This is the default local user for your SSO. Please take note of this password and put it somewhere you won’t lose it.
- In this example I’m just going to automatically install SQL Express on the vCenter server and it will automatically create a database for the SSO server. So, make sure you check Install a Microsoft SQL Server 2008 R2 Express Instance and Click Next.
- The next screen asks you to Set Database User Information. In this screen you’ll set the RSA_DBA user password and the RSA_USER password. These users will be automatically created in the SSO database. Again, make sure you take note of the passwords.
- Enter your FQDN for vCenter (ex: vcenter.domain.com) and click Next. If you get an error message that the FQDN could not be resolved, ensure you have put vCenter in DNS with the proper IP. You may click OK to move on past this message.
- On the next screen you are to configure the Security Support Provider Interface Service. By default it has Use Network Service Account checked. If you’re okay with this, go ahead and click Next.
- Click Next through the Destination Folder screen unless you would also like to change that. Keeping the defaults is generally okay, though.
- Click Next to keep the HTTPS port set to 7444. Again, this is just for the SSO service.
- Click Install to finish the SSO installation. You will see SQL Express getting installed during this time as well. No user input is required, though.
Inventory Service
- The Inventory Service install wizard will automatically appear. You can opt to not overwrite the database or replace the existing one with an empty one. Since mine is a new install I can replace it, but it’s likely you’ll just want to leave your existing database in place if you’re upgrading. This is not the vCenter database, but the Inventory Service database. Click Next.
- Click Install. You’ll see the status bar pop up in a few seconds. With that, the Inventory Service has been installed.
vCenter
- The first screen that pops up is the License Key. You can opt not to put it in at this time. This will install an Evaluation version. You can put the key in now or later. Click Next.
- Next you get the option to either Install a Microsoft SQL Server 2008 Express Instance or Use and Existing Database. In this instance I’m again going to use SQL Express. If you have a database server, I would recommend using that instead. You’ll need to create a DSN on your vCenter server and an empty database on your database server in order to do that. Click Next.
- On the next window, you want to assign a vCenter service user. You may use the SYSTEM account or you can create an Active Directory User that will act as a service account to use. Click Next.
- Click Next on the Ports window to keep the default ports. Again, it’s generally okay to use the default ports as you really shouldn’t be using your vCenter server for other services, such as a Web Server.
- In the vCenter Server JVM Memory I’m again going to keep the default of Small, as I’m also using the SQL Express databases, so this will be a small VMware environment.
- Click Install. Again you’ll see the status bar as the installation completes.
At this point vCenter 5.1 is installed. However, your work is not done. You’ll need to configure vCenter Single Sign On so you can use the vCenter clients (both the fat client and web client) as you’re used to. To configure SSO do the following:
- Back in the installation options click on VMware vSphere Web Client and Click install
- You can pretty much click Next through the installer. It will ask you to enter the password for Admin@System-Domain. Enter the password you noted earlier.
- After that installation is complete open a web browser and point it to your vCenter on port 9443 (ex: https://vcenter.domain.com:9443).
- Sign on using Admin@System-Domain with the password you set during installation. You won’t have all the vCenter access, but that’s okay. This is just to configure SSO.
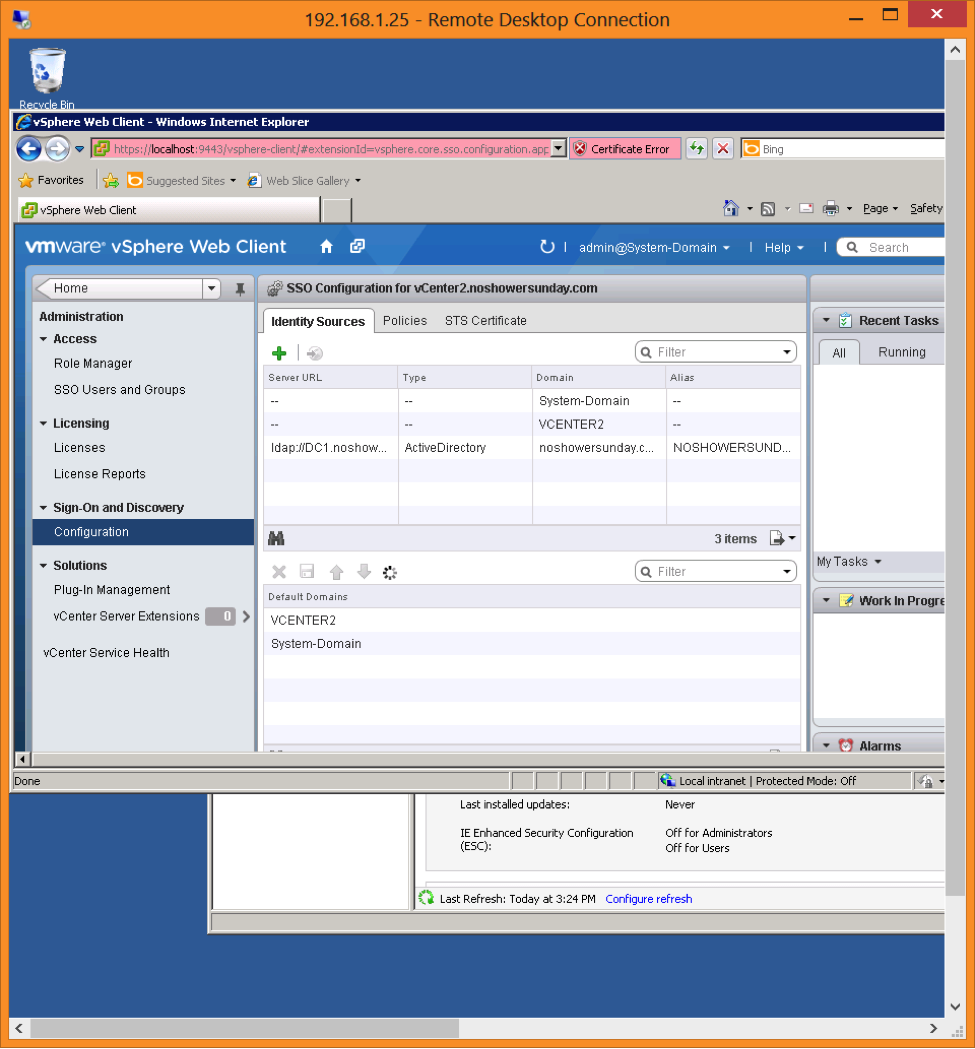
- Click on Administration and then click on Configuration under Sign-On and Discovery
- Highlight ldap://domain.com3268 and then click on the Add to Default Domains icon. You’ll see your domain get added to Default Domains.
- Click the Disk icon in the bottom pane to save the configuration.
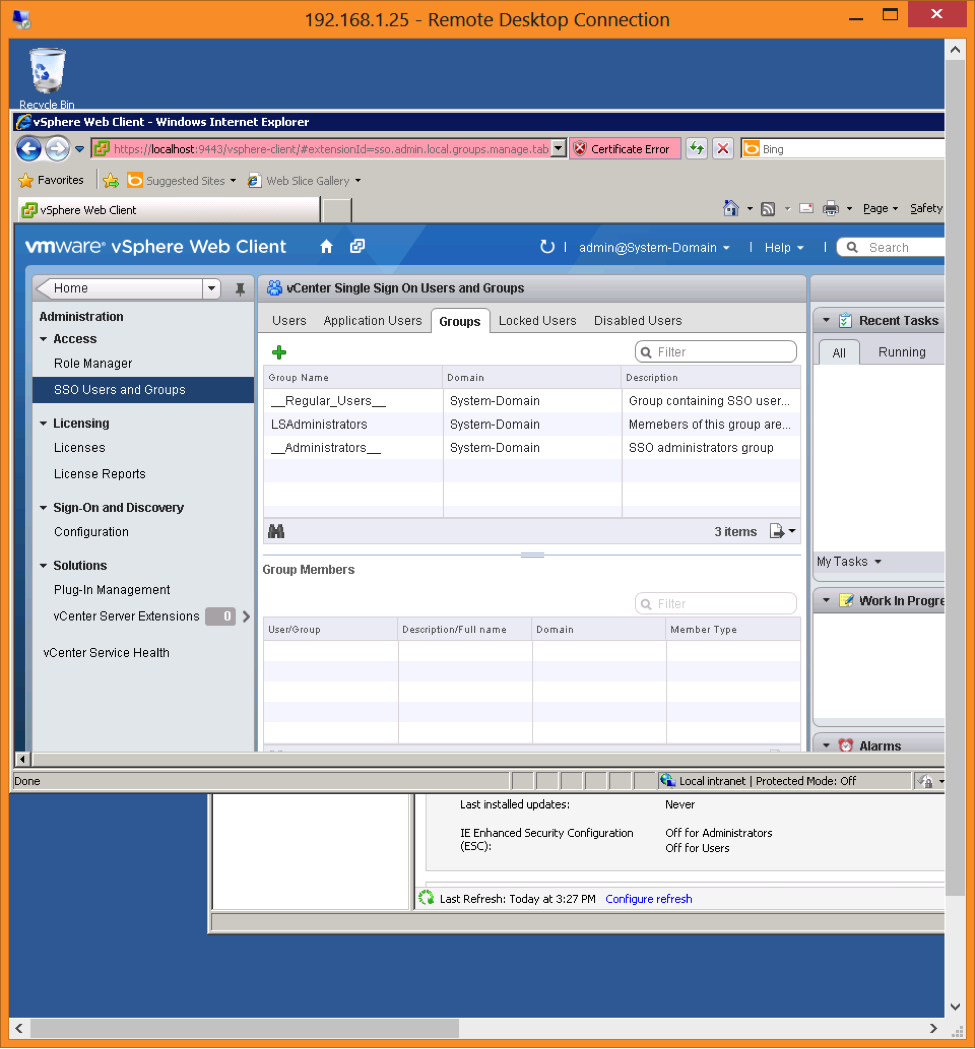
- Now click on SSO Users and Groups in the left pane.
- Click on the Groups tab.
- Click on Administrators.
- Click on the + Sign under Group Members and add the groups or users that you would like to sign in to vCenter.
- Click on the drop down menu next to Identity Source and select your domain. Then add the groups or users from Active Directory to add the appropriate users or groups.
- Click OK.
At this point you’re all set. You can sign on to the vSphere fat client or the vSphere web client as an Active Directory user. You now have a working vCenter that you can use to manage all of your ESXi hosts, datastores, and networking.