B2B Lead Generation Services
Helping technology marketers reach the right buyers, generate demand, and drive pipeline.
Explore All →


Who We Serve
Helping technology marketers connect with the right buyers in competitive markets.
Explore All →


From a traditional vSphere HA standpoint, the jump from Sphere 5.1 to vSphere 5.5 has not brought with it major enhancements. Host monitoring and virtual machine monitoring have stayed pretty much the same in this minor version upgrade.
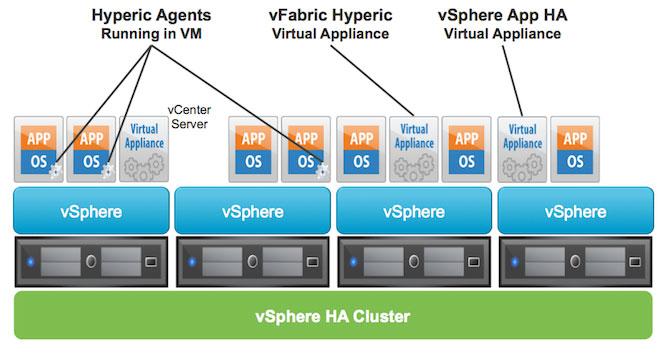
However, with respect to application-centricity in HA, the picture is a bit different. The most exciting change about HA for vSphere 5.5 is definitely the improvements made to vSphere App HA. Application monitoring was possible in previous versions of vSphere, but you had to leverage either third-party agents or create your own monitoring agents using the APIs that came along with it. In vSphere 5.5 VMware has made this a little easier. Now we can monitor an application’s service(s) and restart thing automatically if things start to go down.
This app-centric features comes courtesy of Hyperic. VMware purchased Hyperic a while ago and it has become part of the vFabric suite. Hyperic is the monitoring solution that allows us to monitor app services using vSphere App HA. This requires provisioning two virtual appliances (if you don’t already have a Hyperic server running) in your environment. In this first part of a series we’ll have on HA in vSphere 5.5 I will go through a high level how-to of setting up vSphere App HA. In future parts we’ll dive into how and why it all works.
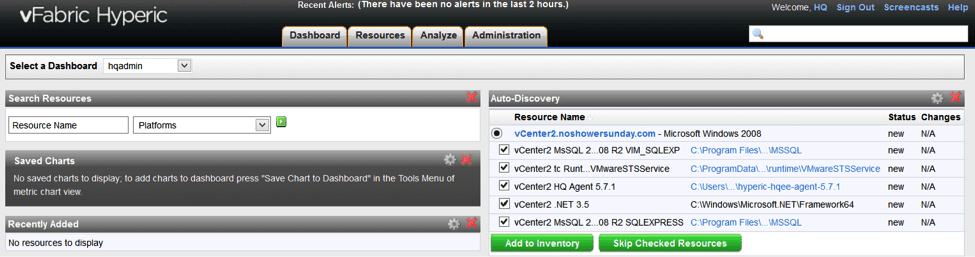
The first thing we need to do is deploy the vFabric Hyperic server. If you’re not already familiar with Hyperic I highly recommend just downloading the vApp. However, you can download the Windows or Linux installer if you prefer. The nice thing about the vApp is that there isn’t much setup. The vApp contains two VMs: Hyperic Server and Postgres Database. Like many vApps you need to deploy this into a DRS cluster. Most likely if you are planning to use App HA you’ll probably have that already configured. If you’ve deployed them correctly you should be able to sign on to https://[IP_Address]:5480 to configure the server with your proper network settings. Then you can sign on to http://[IP_Address]:7443 to sign on to the server and make any configuration changes necessary there. Please see VMware’s documentation for help on configuration. You’ll also need to load the Hyperic Agent on any server you’d like to monitor. You can download the agent from the VMware site as well and there are agents for both Linux and Windows servers. On Windows at least, you can run the batch file with the install command to install it. Then open Services.msc and start the Hyperic HQ Agent. You’ll then need to run the batch file again with the ‘setup’ option to connect it to the Hyperic server. After that you’ll be able to see the server in the Hyperic UI. Click the Add to Inventory button shown below.
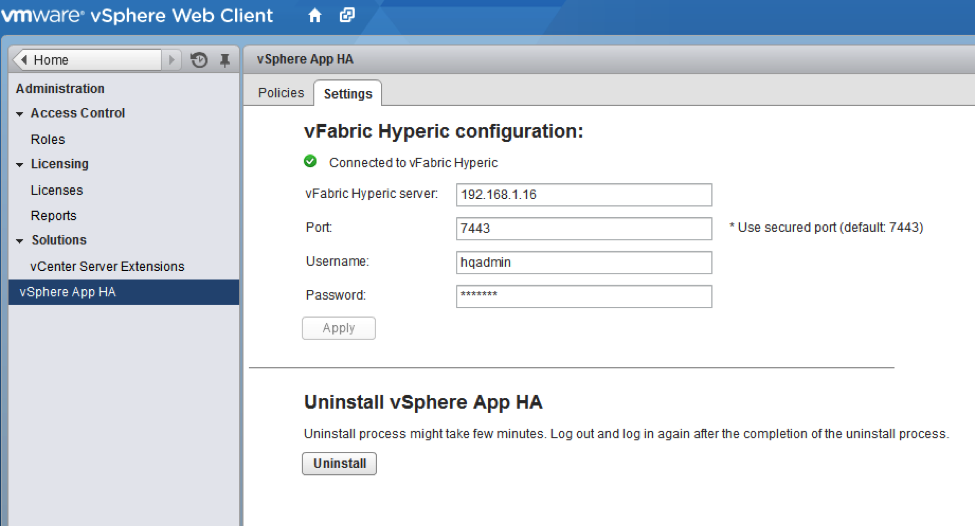
We can deploy the vSphere App HA virtual appliance now after downloading it from the VMware website. Deploy it like any other virtual appliance, filling in any network settings and credentials the wizard asks for. Once that’s deployed successfully we can open vSphere Web Client to actually use it. Please note there is no plugin for the C# client. You must use the web client for any vSphere App HA uses. On the vSphere Web Client click on the Administration menu on the left. If everything has deployed properly you should have a vSphere App HA option to click on now. Highlight that and click on the Settings tab to connect vSphere App HA to your Hyperic server as shown in the figure below. As you can see from the picture we have successfully connected to the Hyperic server.
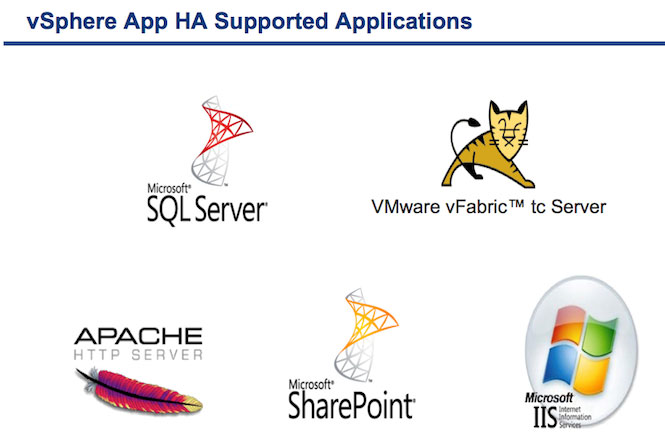
At this point we should be able to start configuring App HA policies. Again, we’ll do this from the vSphere Web Client. Click on the Administration tab again and select the vSphere App HA solution. This time we’ll say on the Policies tab, though. Click on the + sign to create a new policy. A wizard will pop up that asks for the name and then ask us to select a service for the policy template definition. There are only a few services available to select: Apache Tomcat (6.0, 7.0), IIS (6.x, 7.x, 8.x), SQL (2005, 2008, 2008R2, 2012), and Spring Source tc Runtime (6.0, 7.0). For this example I’m going to choose SQL 2008R2.
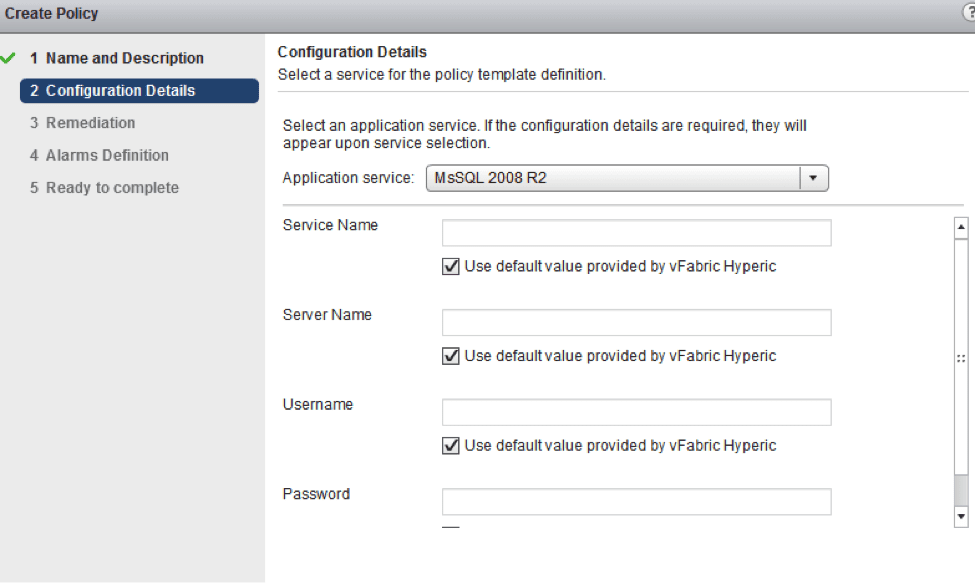
Now in the remediation tab we can pick what App HA should do if it finds the service has stopped. We can choose only to restart the service and if that doesn’t work we can also choose restart the entire VM if the service restart doesn’t work after so many times. The next section allows us to specify if we’d like vCenter to trigger an alarm and notify us by email. When we finally click Finish we can see our new policy. Keep in mind for remediation tasks to work you must have the proper time configured on all servers involved. When you have your policies configured you can then assign them to application services within vCenter.
Documentation is currently pretty sparse. I wouldn’t say it’s the easiest implementation ever. The vSphere App HA is pretty easy in and of itself to install and configure, but if you’re not familiar with vFabric Hyperic you can expect to do a lot of reading and practicing your Google Fu. We’ll go into more of a technical deep dive in future posts and also review vSphere HA in general.